
Sour Dough: Care and Feeding of
A home where sourdough breads are baked plays host to a lively and complex microbiome known as sourdough starter. This community of wild yeasts is easy to cultivate and requires nothing fancy in the way of kitchen gadgetry. A kitchen scale is nice but not essential, a couple of one quart containers with lids, filtered water and basic flour are all that's needed. Wild yeast is too small to see but it's everywhere and can be encouraged to thrive with a simple daily routine. Ignore the romantic claims that a starter needs to be purchased or collected from a particular place. The heirloom starter story, one passed down for generations, is well loved but is in fact a kitchen myth. Sourdough starter is being refreshed every 24 hours, most of it is discarded and is refreshed by your hands, in your kitchen with your water and your flour. Your ability to stick to a schedule is critical when working with sourdough starter. I suggest that the feeding of the starter be linked to something you do every day anyway, like making morning coffee. Essentially, most of the starter is tossed every 24 hours and what is tossed is replaced with fresh water and flour. A vigorous stirring to combine the ingredients and a moment to clean the utensils can all be accomplished while preparing one’s morning coffee. Establish a place in your kitchen for the starter to occupy, it should be in a cooler spot, out of the direct sun, a cupboard corner or the back of a countertop are good choices. Personally, I only use the fridge when I’m not baking very much and want to slow the starter down. For maximum vitality, flavor and vigor keep the starter at ambient temperature. In the summer when temperatures rise the starter will be very active and the amount required to raise your loaves can be adjusted downward. In the cooler months of the year the starter percentage can be adjusted upwards. Establishing a good daily routine will reward you with a reliable kitchen companion that will raise your loaves and stamp them with your own signature terroir, the flavors of your particular environment. Cultivate a small quantity of starter and build it up on the days when you plan to bake. On bake days the starter should be fed with a freshly milled, whole grain flour in proportions to suit the number of loaves that will be produced. Fresh whole grain flour will stimulate the starter into a lively state that will bring the desired results of well developed crumb structure, a crisp crust and a complex flavor.
To Begin:
- Kitchen Scale
- 2- one quart containers with lids
- Mixing spoon
- Dedicated storage spot for the starter and accoutrements
- Good quality all purpose flour
- Filtered water
Capturing the wild yeast
Day 1
Choose one of the quart containers and place on scale.
Tare the weight of the container.
Place 115 grams of flour and 115 grams of filtered water into the container and stir vigorously to combine, cover the container and place it in the designated spot in your kitchen or pantry.
Wash the utensils used and store them, the flour, filtered water and the other container nearby.
Day 2
Place 115 grams of the young starter into the clean 1 quart container and add 115 grams of flour and 115 grams filtered water. Stir vigorously to combine, cover and return to its designated spot along with the cleaned utensils and ingredients.
Day 3
Repeat this and pay attention to any changes that may begin to develop, a sour smell, a few bubbles are signs that the starter is ripening.
Day 4
Weigh the starter and place ½ of it into the clean container with 115 grams of flour and 115 grams of filtered water, stir vigorously to combine, cover and return it and the accoutrement to their designated spot.
Day 5
The starter should be ripening nicely by now, notice the changes in texture and smell. It may be very bubbly or even frothy.
To test the ripeness, fill a glass with water and drop a spoonful of starter into the glass. If it floats then its ready to use, if it sinks it needs more time. Simply continue the steps above for a few more days.
Maintaining the sourdough starter between bakes
Once the starter is ripe it needs to be maintained.
Basically, this means that you will toss 80% of it every morning and replace that amount with equal parts water and flour. The routine starts with scooping 20 grams of starter into the clean quart container and adding 115 grams each of flour and water. Proceed as before, stirring the starter vigorously, covering and allowing it to rest.
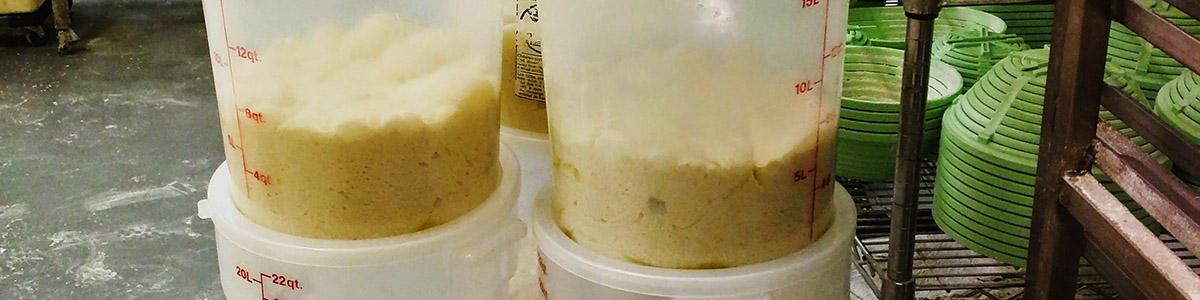
Increasing the starter for baking
On a bake day the routine will change slightly; scoop 30 grams starter into a larger clean container and feed with 200 grams of whole wheat flour and 200 grams of filtered water. This increase will create starter for several loaves. The whole wheat flour will make the starter very lively, it should pass the float test before 6 hours have passed. Figure that the starter represents about 20% of the total bread formula. After the starter ripens, pull off 30 grams and feed it with the maintenance dose of 115 grams of regular flour and 115 grams of filtered water and set it aside in its spot. Use the remaining starter as needed to raise your bread dough.
Basic Bread Formula
- 100% flour
- 75 - 85% Filtered water
- 2% salt
- 20% sourdough starter
- 1,000 grams of Roan Mills whole milled whole wheat flour
- 850 grams of filtered water
- 200 grams of sourdough starter
- 20 grams sea salt
Once you have created the bulk feed for your starter and placed it in its spot to ripen you can grab another clean container and add all of the flour, water and salt together. Mix until combined and cover. Leave this to rest while the starter ripens. Once the starter passes the float test, usually after 5 or 6 hours, scale off the 200 grams (or more if you are producing more loaves) and combine with the well hydrated dough. Mix well, cover and allow the final dough to rest for 20 minutes before stretching and folding the dough 3 or 4 times. Cover and repeat the stretch and fold sequence twice more at 20 minute intervals.
At this point the bulk dough can be left to ripen for several hours at ambient temperature. As it develops it will rise so your container needs to be large enough to accommodate the increase.
When you are ready to shape the dough, pull it from the container and scale off your dough.
600 grams is a typical weight but this is entirely up to the baker.
Shape the bread and place in a floured bread basket or improvise one with well floured kitchen towels draped into a 1 qt bowl
These can be slipped into a large plastic bag and held in the fridge for up to 24 hours before baking. Alternately, they can be left at ambient temperature for an hour or two and baked the same day. Preferences for the long, cold fermentation are valid. The acids from the sourdough starter break down the proteins in the wheat, this process makes the nutrients more available and the final bread more digestible. The flavor and keeping quality of the bread is also noticeably improved.
That said, a bake that starts and finishes on the same day still produces very delicious results.
On Baking
A cast iron, double Dutch oven makes a great bread oven. Place it into a cold oven and preheat oven to 500°F.
Once the oven and Dutch oven are at temperature it's time to bake the bread. Carefully remove the hot Dutch oven from the oven and place it on the stove. Remove the lid and plop your bread into it, carefully score the top and cover the loaf with the hot lid. Quickly return to the 500°F oven.
After 20 minutes, remove the lid and drop the temperature to 400°F.
Continue baking for 30 minutes or more until desired color is achieved.
Pull from oven and remove from dutch oven, allow to cool on a wire rack.
Slowing Down the Sourdough Starter
If you want to bake less than once a week the sourdough starter can be stored in the fridge and fed once a week. To keep it healthy it’s best to keep it sized up to bake day proportions.
Sourdough starter can be frozen with good results, freeze it after it's been fed and ripened for several hours. To activate, thaw it and follow the regular maintenance schedule. It should bounce back to full vigor within a couple of days.
Using the Discarded Sourdough Starter
The discarded starter can be used in pancakes and waffles or composted.
It can also be dried and stored in a paper bag. Dried starter can be used to start a new sourdough starter.
On Flour and Water Percentages
The percentage of hydration will vary from flour to flour and the type of bread you want to bake. A sandwich bread has the support of the pan and can be hydrated at 100% or more. Porridge breads are filled with cracked grains and the dough is poured into the pans and these bake up into soft and flavorful breads that can be sliced and toasted.
The process of maintaining the sourdough starter becomes intuitive over time. The look and smell of it will become familiar and working with it becomes second nature. The results will please you and those that break bread with you.